
Ah, the nostalgic joy of dessert! I can’t help but smile when I think of bright colors dancing on a plate, each one a little reminder of sunny days and childhood treats. One of my fondest memories is making jello with my grandma, who believed that life should always be a little sweeter. As we mixed flavors and watched those vibrant jello layers swirl together, it sparked the inspiration for this delightful Colorful Creamy Rainbow Jello Poke Cake. It’s a dessert that’s not only dazzling to behold but also wonderfully creamy and packed with flavor—a perfect centerpiece for birthdays, holidays, or even a simple weekend gathering. So, roll up your sleeves and let’s get started on this eye-catching masterpiece that will surely bring a smile to your face!
Why You’ll Love This Recipe
- Visually stunning: Perfect for parties or family gatherings!
- Easy to make with simple ingredients—great for bakers of all levels.
- Customizable: Mix and match flavors to make it your own!
- Fun blend of textures: Soft cake, creamy filling, and a jello topping.
- Deliciously refreshing: A perfect treat for warm weather!
Ingredients
Before we dive into the how-to, let’s gather our colorful ingredients. It’s a blend of sweetness that teases your taste buds and makes your kitchen smell heavenly!
- For the Cake:
- 1 box (15.25 oz) vanilla cake mix
- 3 large eggs
- 1 cup water
- 1/3 cup vegetable oil
- For the Poke:
- 1 package (3 oz) each of four different colors/flavors of jello (like strawberry, orange, lime, and grape)
- 2 cups boiling water
- For the Creamy Topping:
- 1 package (8 oz) cream cheese, softened
- 1 cup powdered sugar
- 1 cup whipped topping (like Cool Whip)
- For Garnish:
- Additional whipped topping
- Rainbow sprinkles
- Fruits (optional, for a fresh twist!)
Step-by-Step Instructions
Alright, let’s get baking! Follow these steps, and you’ll have a wonderful cake in no time.
- Preheat your oven: Start by preheating your oven to 350°F (175°C). This ensures your cake gets that perfect rise.
- Prepare your cake batter: In a large mixing bowl, combine the cake mix, eggs, water, and vegetable oil. Mix until just combined—don’t overmix! This is key to keeping your cake light and fluffy.
- Bake the cake: Pour your batter into a 9×13 inch baking dish. Bake for 25-30 minutes, or until a toothpick inserted into the center comes out clean. Oh, that golden brown cake aroma filling your kitchen is unbeatable!
- Cool the cake: Once baked, let it cool in the pan for about 10 minutes. Then, carefully poke holes all over the surface of the cake using the handle of a wooden spoon or a fork. Make sure the holes are about an inch apart. This step is where all that jello goodness will seep in!

- Mix the jello: In separate bowls, dissolve each flavored jello mix in 1 cup of boiling water. Stir until fully dissolved, which should take just a few minutes. The colors will instantly brighten up your kitchen—so pretty!
- Pour in the jello: Carefully pour different colors of dissolved jello over the cake. You can mix the colors for a tie-dye effect or pour them in sections for a neat, layered look. Ensure the jello fills all those little holes.
- Chill the cake: Cover the cake with plastic wrap and refrigerate for at least 4 hours, or ideally overnight. This lets the jello do its magic, melding flavor and brightening the cake.
- Prepare the creamy topping: In a mixing bowl, beat the softened cream cheese and powdered sugar until smooth. Then gently fold in the whipped topping until everything is well combined and creamy. You might just want to sneak a taste at this point—it’s truly irresistible!
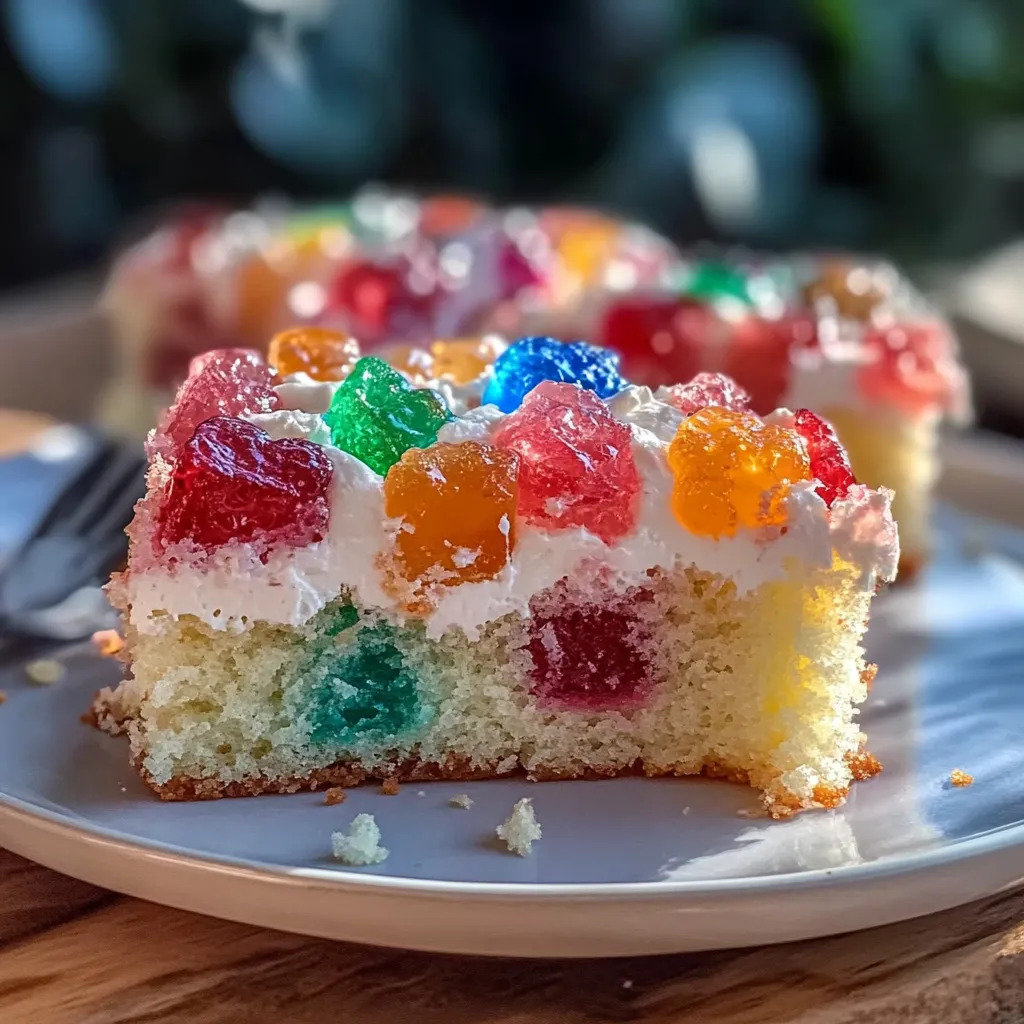
- Top the cake: Once the cake has chilled, spread the creamy topping evenly over the cake. Get a nice thick layer going—it’s the star of the show!
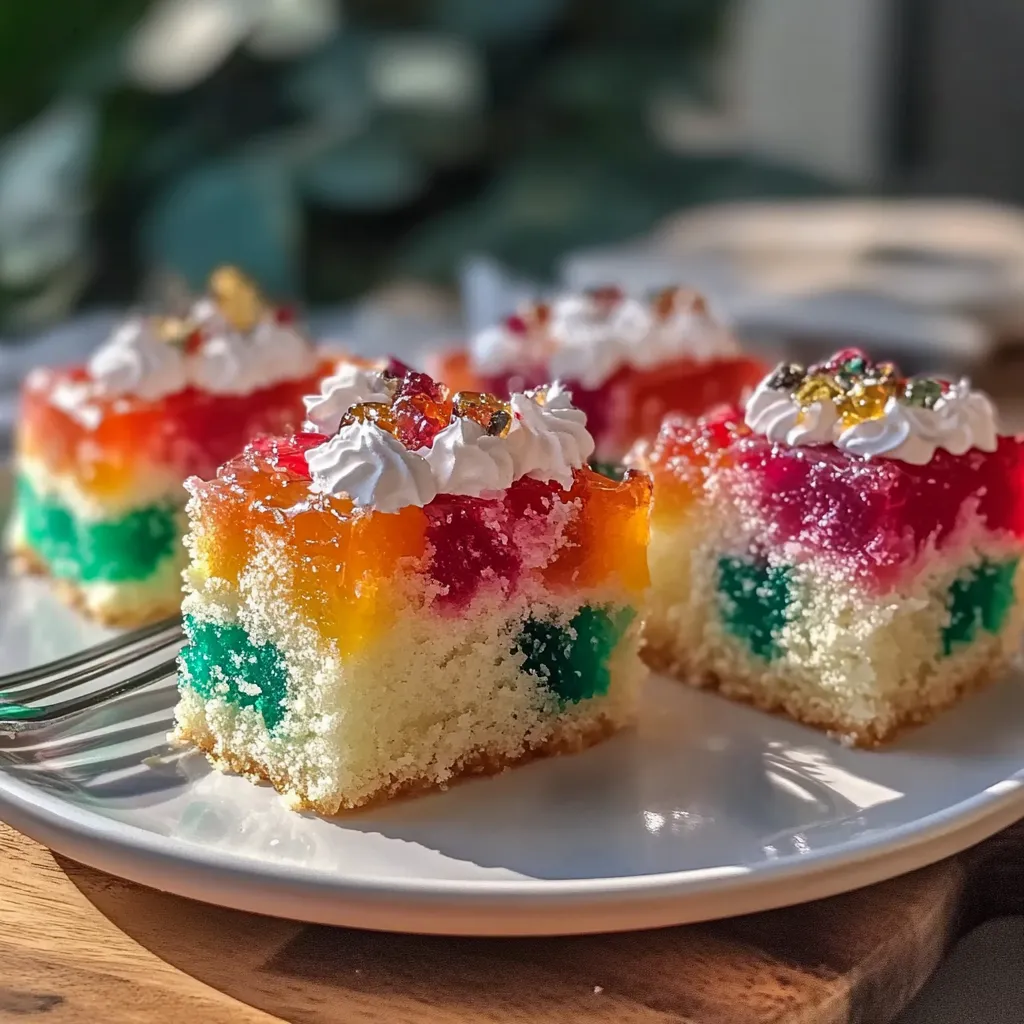
- Garnish: Finish it off with rainbow sprinkles and, if you like, some fresh fruit on top. It’s all about that festive look!
- Serve: Slice into squares and serve on colorful plates. Watch everyone’s faces light up—this dessert is a crowd-pleaser!
Pro Tips & Variations
Want to switch things up? Here are some fun twists and tips that can transform your cake.
- Flavor Combos: Try different jello flavors! Blue raspberry, lemon, or even tropical punch can make for exciting variations.
- Diet-Friendly Swaps: If you want to make it gluten-free, use a gluten-free cake mix. And for a lower-sugar version, you can opt for sugar-free jello and a light whipped topping.
- Add Fruit: Layer in some slices of strawberries or bananas between the jello and cream topping for an added freshness.
- Extra Crunch: Add crushed cookies or nuts on top for a textural contrast. That crunchy sweet bite is delightful!
Serving Suggestions
This jello poke cake is best served chilled, making it the perfect dessert for warm days. Pair it with a steaming cup of coffee or even a scoop of vanilla ice cream on the side. Need a great presentation idea? Serve the cake on a colorful cake stand and garnish the table with matching tableware and flowers. It’s all about creating that delightful vibe that makes everyone want to tuck in!
Storage Tips
Have leftovers? Lucky you! Here’s how to keep your jello poke cake fresh and delicious:
- Refrigeration: Cover any leftover cake tightly with plastic wrap or aluminum foil and store it in the fridge for up to 3 days. The longer it sits, the more the flavors meld!
- Freezing: If you want to save some for a later date, you can freeze the un-frosted cake for up to 3 months. Just make sure it’s wrapped really well! When you’re ready to eat, thaw it overnight in the fridge, then finish with jello and topping.
- Reheating: Generally, there’s no need to reheat this cake, but if you enjoy a warm dessert, just pop a slice in the microwave for about 10-15 seconds. Enjoy it warm with a dollop of extra whipped cream!
FAQs
Can I use homemade jello instead of store-bought?
Absolutely! If you’re feeling adventurous, you can make your own jello. Just ensure it’s firm enough to hold up on the cake.
Can I make this cake in advance?
Sure! This cake is perfect for making ahead of time. Just allow it to chill overnight after adding the jello and cream topping. It’ll taste even better the next day!
How can I make it more colorful?
Use vivid jello flavors and consider adding colorful fruits as garnish. The more, the merrier—rainbow sprinkles are a must!
What if I don’t have whipped topping?
No worries! You can whip up some heavy cream with a bit of sugar to use instead. Just make sure it holds soft peaks for the best texture!
Can I use a different cake flavor?
Definitely! Chocolate cake makes for a decadent twist, or try lemon cake for a citrusy surprise. The possibilities are endless!
Conclusion
And there you have it, my friends! Your very own Colorful Creamy Rainbow Jello Poke Cake, a dessert bursting with flavor and joy. I can hardly wait for you to give this a try! Don’t forget to share your sunny pictures and stories with me in the comments. Baking is so much more fun when we share our culinary adventures together. Happy baking, and enjoy every vibrant bite!
Print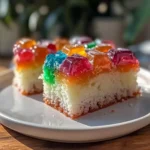
Vibrant Creamy Rainbow Jello Poke Cake Recipe: Easy Step-by-Step
- Total Time: 6 hours
- Yield: 12 servings 1x
Description
Discover how to make a colorful creamy jello poke cake with this easy step-by-step guide. Perfect for any celebration! 150 chars
Ingredients
Instructions
Notes
This Colorful Creamy Rainbow Jello Poke Cake is a dazzling dessert that combines fun colors, creamy textures, and delightful flavors, perfect for any gathering.
- Prep Time: 30 minutes
- Cook Time: 30 minutes
- Category: Dessert
- Cuisine: American
Nutrition
- Serving Size: 12 servings
- Calories: 250
- Sugar: 20g
- Fat: 10g
- Carbohydrates: 37g
- Fiber: 1g
- Protein: 3g
Keywords: Jello Poke Cake, Rainbow Cake, Dessert Recipe, Colorful Cake, Easy Cake Recipe

Leave a Comment