
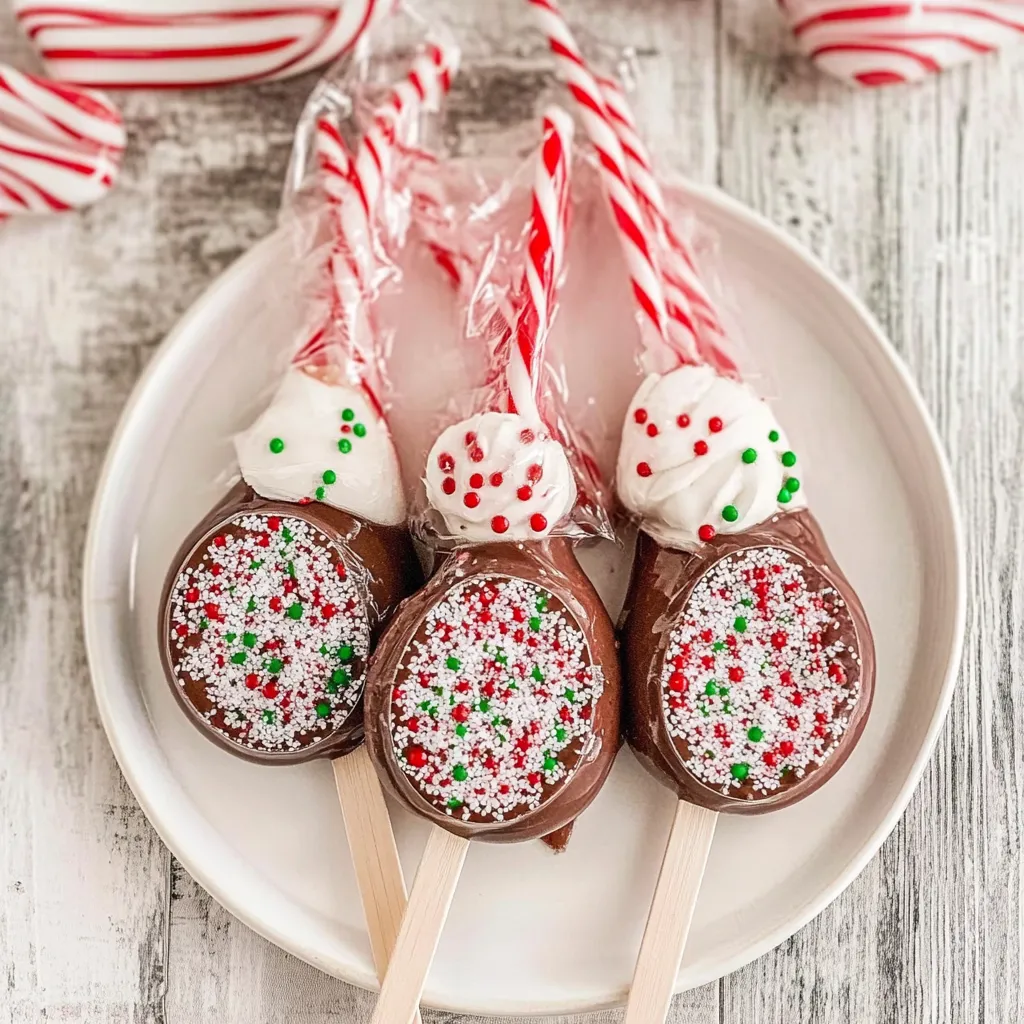
Have you ever wondered how a simple holiday treat can elevate your hot chocolate experience to new heights? DIY peppermint candy spoons are not only a feast for the eyes but also bring a delightful twist to your favorite warm beverages. Imagine stirring a steaming cup of cocoa with a candy spoon that melts smoothly, infusing your drink with sweet peppermint goodness. Let’s dive into this delightful recipe that combines simple ingredients and a touch of creativity.
Ingredients List
| Ingredient | Quantity | Substitution Options |
|---|---|---|
| Candy canes | 12 pieces | Crushed peppermint candies |
| Chocolate chips (white or dark) | 1 cup | Candy melts or chocolate bars |
| Wooden or plastic spoons | 12 spoons | Stirring sticks or mini plastic spoons |
| Sprinkles (optional) | 1/2 cup | Colored sugar or edible glitter |
Timing
This delightful DIY project will take approximately 30 minutes of your time to prepare and create, making it a quick option compared to more elaborate recipes. In fact, this is nearly 40% less time than traditional candy-making recipes that can take hours! With just a few simple steps, you can create charming peppermint spoons perfect for the holiday season.
Step 1: Prepare the Candy Canes
Begin by preheating your oven to 350°F (175°C). Lay the candy canes on a baking sheet lined with parchment paper.
Step 2: Bake the Candy Canes
Bake the candy canes in preheated oven for about 5-7 minutes. Keep an eye on them, as you want them to soften but not melt completely.
Step 3: Shape the Candy Canes
Once softened, immediately remove the pan from the oven. Using a heatproof spatula, carefully reshape each candy cane into a spoon by bending the straight end downwards. Allow them to cool completely.
Step 4: Melt the Chocolate
While the candy canes cool, melt the chocolate chips in a microwave-safe bowl. Heat in intervals of 30 seconds, stirring in between until smooth.
Step 5: Dip the Spoons
Dip the curved end of each cooled candy cane into the melted chocolate, coating it generously. Allow any excess chocolate to drip back into the bowl.
Step 6: Add Sprinkles
If using sprinkles, immediately sprinkle a variety over the dipped chocolate before it sets. This adds a colorful touch and festive appearance.
Step 7: Let Them Set
Place the dipped spoons onto parchment paper and let them sit at room temperature until the chocolate hardens completely. You can speed up this process by placing them in the refrigerator for about 10-15 minutes.
Nutritional Value / Health Benefits
| Nutrient | Per Serving (1 spoon) |
|---|---|
| Calories | 90 kcal |
| Protein | 1 g |
| Total Fat | 3.5 g |
| Saturated Fat | 2 g |
| Carbohydrates | 16 g |
| Sugar | 12 g |
| Fiber | 0 g |
| Iron | 1% DV |
The candy itself can provide a quick energy boost thanks to its sugar content, while the chocolate adds antioxidants, promoting heart health and delivering a satisfying treat that can be enjoyed in moderation.
Healthier Alternatives for the Recipe
For a healthier spin on these delightful peppermint spoons, consider the following modifications:
- Use dark chocolate instead of milk chocolate to increase antioxidants and reduce sugar content.
- Substitute natural sweetener or coconut sugar for refined sugar, particularly if using homemade chocolate.
- Try using whole grain wooden spoons or switches in place of plastic for eco-friendliness.
- Get creative with toppings: opt for nuts or seeds instead of sprinkles for added texture and health benefits.
Serving Suggestions
These peppermint candy spoons are versatile and can jazz up various warm drinks. Here are some creative serving ideas:
- Stir them into hot chocolate or coffee for an instant flavor boost.
- Gift them to friends bundled into a beautiful box with a festive ribbon.
- Use them as a playful garnish on desserts like ice cream sundaes.
- Pair them with homemade marshmallows for an enchanting hot cocoa experience.
Common Mistakes to Avoid
To ensure your DIY peppermint candy spoons turn out as delightful as possible, keep these common pitfalls in mind:
- Overheating the candy canes can result in sloppy melting. Monitor them closely in the oven.
- Not allowing the candy canes to cool sufficiently before reshaping can lead to breakage.
- Using chocolate that hasn’t been tempered correctly can lead to a dull finish. Make sure to follow the melting instructions diligently.
- Forgetting to sprinkle in time can mean your toppings fail to stick, so act swiftly after dipping.
Storing Tips for the Recipe
Want to keep your peppermint candy spoons fresh? Here are the best practices for storage:
- Store them in an airtight container in a cool, dry place to prevent them from becoming too sticky.
- If you’ve made a large batch, separate layers with parchment paper to avoid sticking.
- Avoid storing them in direct sunlight or in a warm spot, as the chocolate can melt.
Conclusion
DIY peppermint candy spoons are a delightful, easy-to-make treat that brings festive flair to your drinks. With simple ingredients and clear steps, you can create a unique gift or a fun addition to your holiday festivities. Don’t forget to try this sweet treat and share your thoughts in the comments below. Subscribe for more exciting recipes and tips!
FAQs
A: Can I use other flavors of candy canes?
Absolutely! While peppermint is traditional, you can experiment with other flavors like cinnamon or fruit-flavored candy canes to create unique designs.
B: How long do these candy spoons last?
When stored properly in an airtight container, peppermint candy spoons can last up to two weeks before losing their freshness and flavor.
C: Can I make these spoons vegan?
Yes! Simply use dairy-free chocolate chips, and ensure the spoons you’re using are cruelty-free.
D: How can I make these spoons more festive?
Feel free to get creative with toppings by using different colored sprinkles, edible glitter, or even a drizzle of colored chocolate for added flair.
E: Is it possible to prepare these spoons ahead of time?
Definitely! You can prepare the candy spoons a week in advance and store them until you’re ready to serve or gift them.


Leave a Comment