
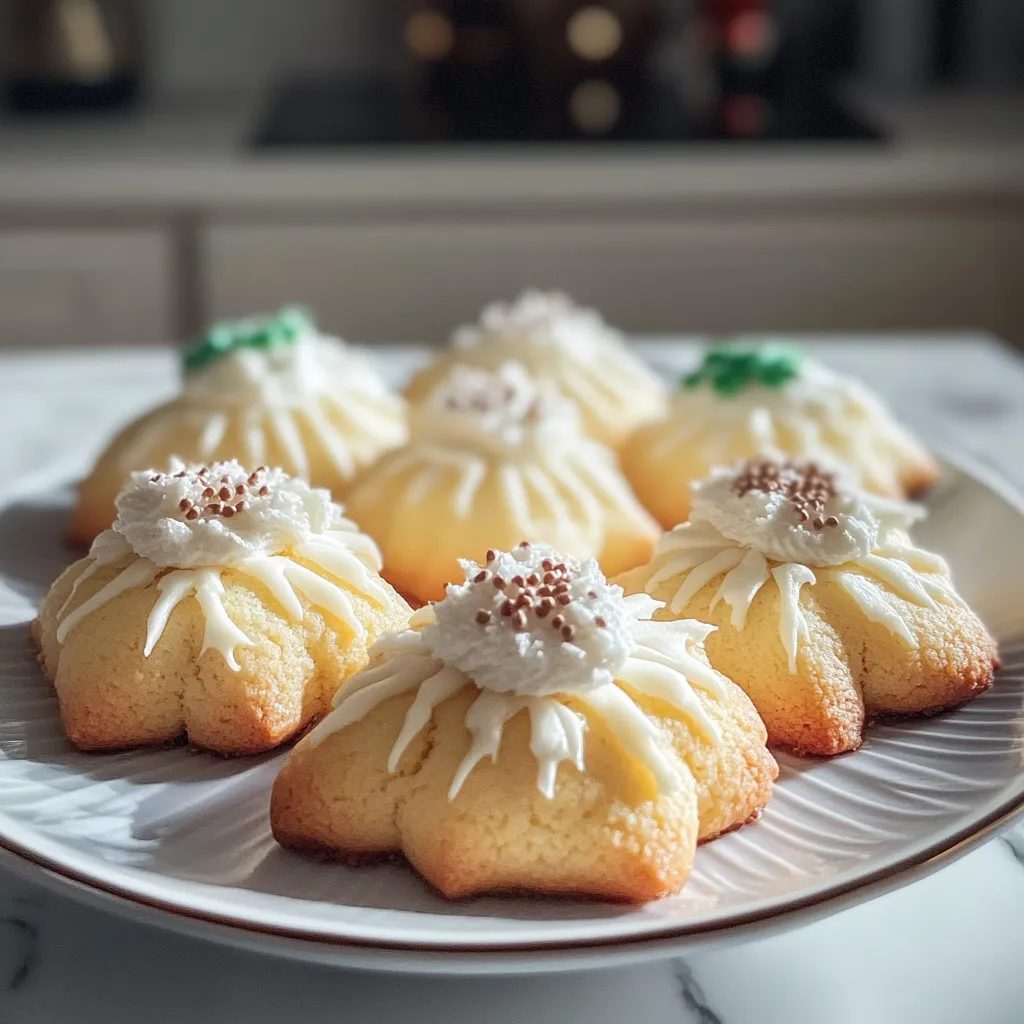
Oh, the joy of baking Danish Butter Cookies! Every time I whip up a batch, memories flood back of cozy afternoons spent in my grandmother’s kitchen, the rich aroma of butter mingling with the sweet vanilla wafting through the air. Those moments spent with her, rolling dough and pressing it into the shapes of our favorite stars and hearts, are some of my fondest childhood memories. It’s that simple yet profound love of food that brings us together, like the warm hug of a freshly baked cookie. Today, I want to share this delightful recipe for Danish Butter Cookies Classic with you—one that embodies comfort, tradition, and pure happiness in every bite.
Why You’ll Love This Recipe
- Simple ingredients you probably already have at home.
- Perfect for any occasion: from holiday gatherings to casual tea times.
- Soft, buttery texture that melts in your mouth.
- Fun for the whole family—get the kids involved in shaping and decorating!
- Can be made ahead and are freezer-friendly for later enjoyment.
Ingredients
Gathering your ingredients is the first step to baking magic! Here’s what you’ll need:
- 1 cup (226g) unsalted butter, softened (let it sit at room temperature for that perfect spreadable consistency)
- 2/3 cup (85g) granulated sugar
- 2 teaspoons pure vanilla extract (the more natural, the better)
- 2 cups (250g) all-purpose flour
- 1/2 teaspoon salt (this enhances the sweetness, trust me!)
- Optional: 1/4 teaspoon almond extract for a delightful twist
- Optional: Colored sugar, sprinkles, or chopped nuts for decorating
Step-by-Step Instructions
Now that you have everything ready, let’s dive into the baking process!
- Preheat your oven: Start by preheating your oven to 350°F (175°C). This ensures that when your cookies hit the oven, they start baking perfectly from the get-go.
- Beat the butter and sugar: In a large bowl, cream together the softened butter and granulated sugar until it’s fluffy and light. This usually takes about 3-5 minutes. Don’t skip this step, as it makes a big difference in texture!
- Add the flavors: Mix in the vanilla extract and, if you’re using it, the almond extract. Just a dash of almond adds an unforgettable layer of flavor.
- Combine the dry ingredients: In a separate bowl, whisk together the flour and salt. Gradually add this mixture to the butter and sugar blend. Mix it together just until combined – remember, don’t overmix or your cookies will be tough!
- Shape the cookies: You can pipe the dough using a pastry bag with a star tip for traditional Danish cookies or roll it out and use cookie cutters for fun shapes. If piping, squeeze out the dough on a parchment-lined baking sheet. If using cutters, roll the dough to about 1/4-inch thick and cut out shapes.
- Add your toppings: If you desire, sprinkle the cookies with colored sugar or nuts before baking for an extra touch of color and crunch.
- Bake: Bake your cookies in the preheated oven for about 10-12 minutes, or until the edges are lightly golden. Keep an eye on them, as they can go from perfect to overdone in a snap!
- Cool and enjoy: Once baked, allow the cookies to cool on the baking sheet for a few minutes before transferring them to wire racks to cool completely. The smell in your kitchen will be totally irresistible.
Pro Tips & Variations
Here’s where you can get a little creative! While the classic recipe is absolutely delightful, don’t hesitate to customize it:
- Add spices: A pinch of cinnamon or nutmeg can add a warming aroma that’s perfect for the holiday season.
- Choco-chips! For chocolate lovers, fold in some mini chocolate chips for a delightful twist.
- Dip in chocolate: After cooling, dip half of each cookie in melted chocolate for a decadent treat!
- Gluten-free: You can substitute all-purpose flour with a 1:1 gluten-free blend for a wonderful gluten-free option.

Serving Suggestions
Now that your delicious Danish Butter Cookies are baked and cooled, how will you enjoy them? Personally, I love serving them alongside a steaming cup of tea or coffee. Picture this: a cozy afternoon, the sun streaming through the window, and a plate of buttery cookies right in front of you. Perfection! You can also pack them up for a sweet gift or serve them at celebrations. Imagine the delight on your guests’ faces when they take that first bite! These cookies are perfect for dunking, too—try pairing them with hot chocolate for an extra special treat.
Storage Tips
Baking is just half the fun; storing your cookies properly ensures they stay fresh and yummy! Here’s how:
- Room Temperature: If you think you’ll eat them within a week, store them in an airtight container at room temperature, and they will stay delicious.
- Refrigeration: For longer storage, place them in the fridge, but make sure to keep them in an airtight container to prevent them from drying out.
- Freezing: You can freeze baked cookies for up to three months! Just ensure they are completely cooled, layer them with parchment paper in a freezer-safe container or bag, and then store away. When you’re ready for a treat, let them thaw at room temperature.
- Reheating: If you’d like to enjoy your cookies warm, pop them in a preheated oven at 300°F (150°C) for just a few minutes. They’ll be as good as new!
FAQs
Can I use salted butter instead of unsalted?
Absolutely! Just omit the additional salt in the recipe. Using salted butter will give your cookies a slightly different flavor, but they’ll still be delicious.
How do I know when the cookies are done baking?
Look for the edges to turn a light golden brown. The center might look a tad soft, but the cookies will continue to firm up as they cool!
Can I make these cookies ahead of time?
Yes! You can make the dough in advance and either freeze it or refrigerate it for a few days. When you’re ready, simply shape and bake as usual!
What’s the best way to store leftover cookies?
Place them in an airtight container to keep them fresh. If they start getting a bit too hard, you can add a slice of bread into the container to help retain the moisture.
Conclusion
And there you have it—your very own batch of delightful Danish Butter Cookies Classic! I hope this recipe brings you as much joy as it has brought to me over the years. Baking is all about creating memories, so I’d love to hear from you! How did your cookies turn out? Did you try any fun variations? Please drop a comment below or share your thoughts. Happy baking, dear friends! May your days be filled with warmth and buttery goodness!
Print
Irresistible Danish Butter Cookies: Classic Recipe Unleashed!
- Total Time: 32 minutes
- Yield: 24 cookies 1x
Description
Discover the classic recipe for Danish butter cookies! Perfectly sweet, buttery treats for any occasion. Bake and enjoy these irresistible delights today!
Ingredients
Instructions
Notes
Delightful Danish Butter Cookies that are soft, buttery, and perfect for any occasion. Enjoy them fresh or store them for later!
- Prep Time: 20 minutes
- Cook Time: 12 minutes
- Category: Dessert
- Cuisine: Danish
Nutrition
- Serving Size: 24 cookies
- Calories: 150
- Sugar: 6g
- Fat: 8g
- Carbohydrates: 20g
- Fiber: 0g
- Protein: 2g
Keywords: Danish Butter Cookies, Baking, Cookies, Dessert Recipe, Classic Recipe


Leave a Comment