
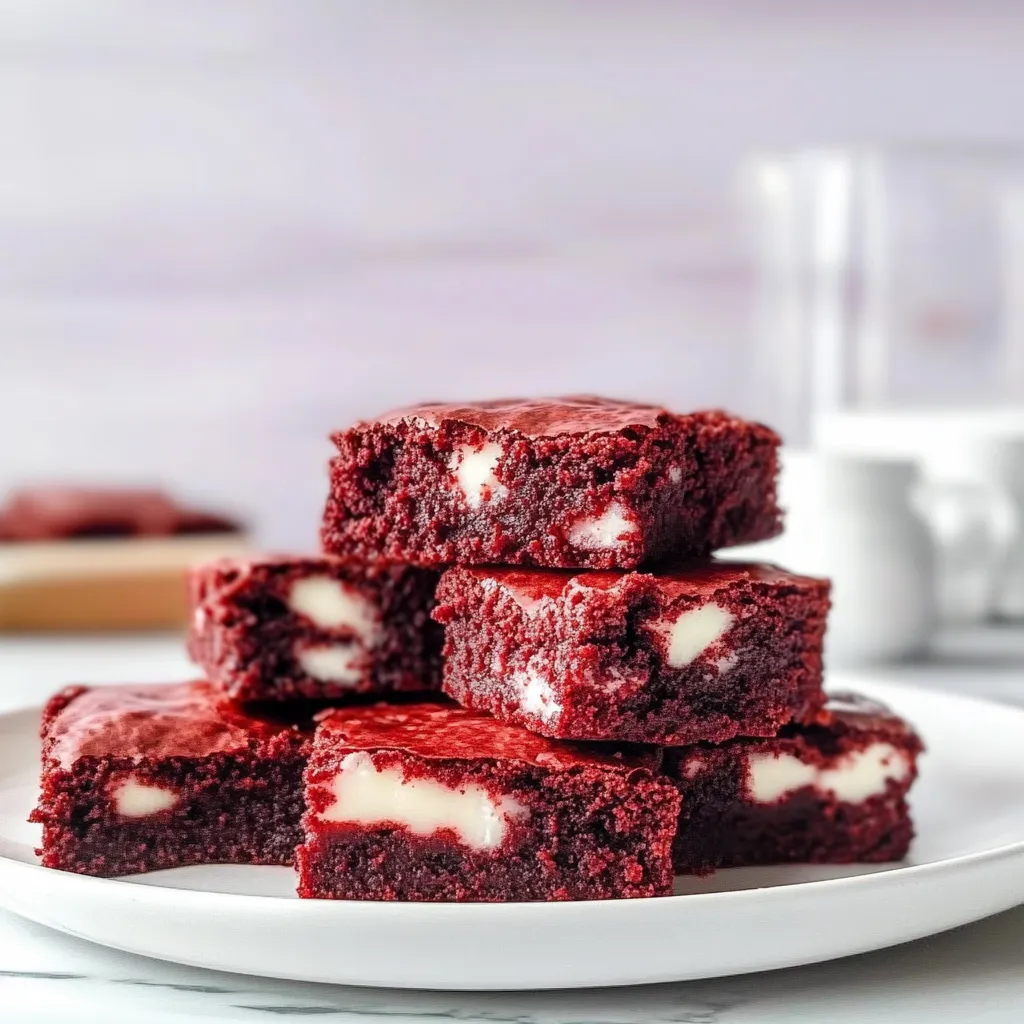
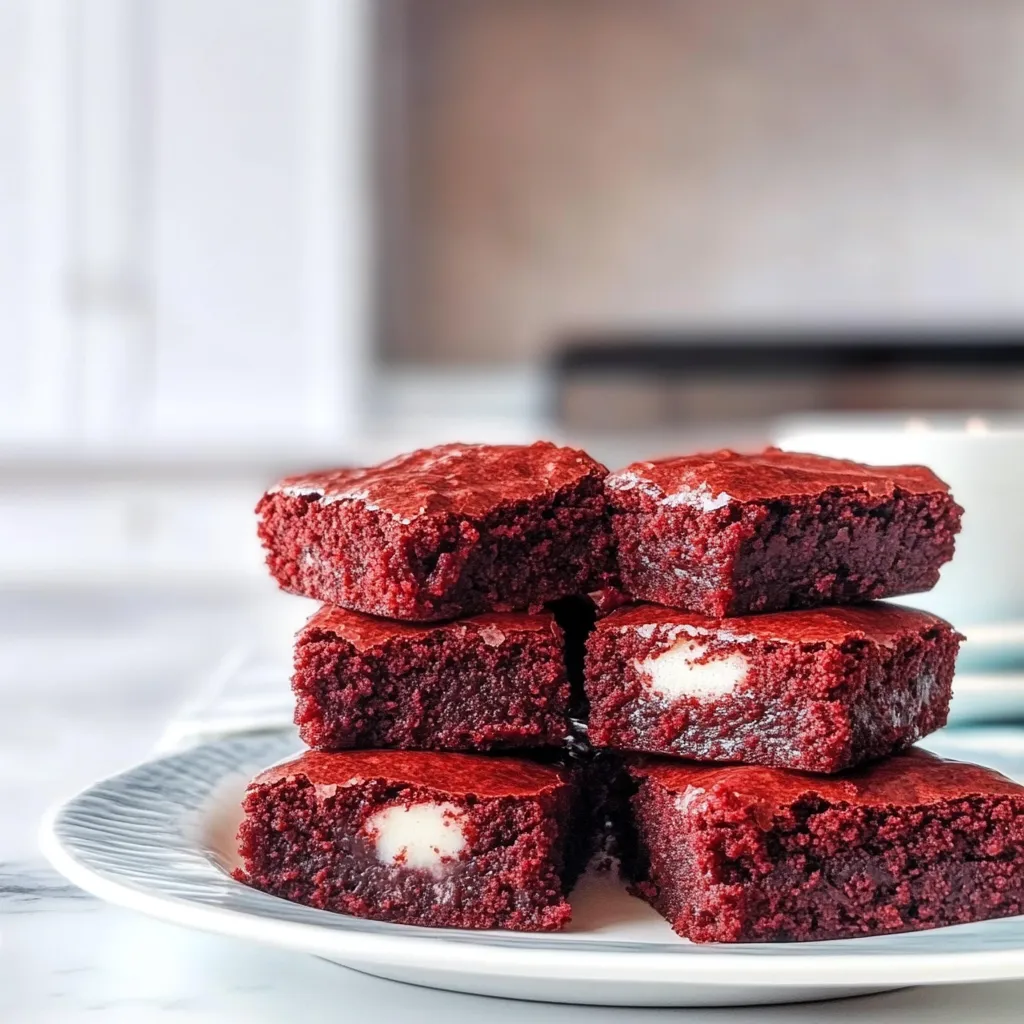
Hey there, my lovely friends! Today, I’m taking you on a little culinary journey that combines two of the best dessert worlds: the rich, chocolatey decadence of brownies and the luxurious allure of red velvet cake. Yes, you guessed it! We’re diving into the sultry, sweet world of Red Velvet Brownies. I can already imagine the vibrant red color swirling in the mix, the buttery aroma wafting through the kitchen, and the melt-in-your-mouth texture that wraps you in a cozy hug. This recipe has been a cherished favorite in my home—perfect for autumn gatherings, cozy winter nights, or just because you need a little sweetness in your day.
Let me take you back a bit—there was a time when I was the unofficial dessert maker in my circle of friends. People would gather around my dining table, and I felt like a magician, making sweet treats appear seemingly out of thin air. One particular evening, I experimented with red velvet cake mix and decided to transform it into gooey brownies, and oh boy, did they disappear faster than I could plate them! The way the reddish-maroon color contrasted with the cream cheese frosting was just too beautiful not to share. Plus, the taste? Utterly divine.
Why You’ll Love This Recipe
- Easy to make: These brownies are straightforward with simple ingredients, making them a quick treat for any day of the week.
- Impressive yet cozy: They’re perfect for serving at gatherings but just as satisfying to enjoy at home.
- Rich and decadent: They pack a flavor punch that combines the best of chocolate and vanilla.
- Customizable: Mix in chocolate chips, sprinkle with nuts, or top with your favorite frosting!
Ingredients
Before we dive in, let’s gather our ingredients! Here’s what you’ll need:
- 1 cup (226g) unsalted butter, melted
- 2 cups (400g) granulated sugar
- 4 large eggs
- 1 teaspoon vanilla extract
- 1 cup (125g) all-purpose flour
- 1 cup (100g) unsweetened cocoa powder
- 1 teaspoon baking powder
- ½ teaspoon salt
- 2 tablespoons red food coloring (preferably gel for intensity)
- ½ cup (120ml) buttermilk
- 1 cup (170g) chocolate chips (optional)
Note: Using buttermilk adds a lovely tang that pairs beautifully with the sweetness!
Step-by-Step Instructions
Alright, friends, let’s put on our aprons and get baking! Follow these steps, and you’ll have a batch of Red Velvet Brownies that will have everyone raving.
- Preheat your oven: Set it to 350°F (180°C). Grease and line a 9×13 inch baking pan with parchment paper, letting the edges overhang. This will make lifting the brownies out so much easier later!
- Mix the wet ingredients: In a large mixing bowl, whisk together the melted butter and sugar until it’s creamy and well-combined. Then, add the eggs one at a time, mixing well after each addition. Don’t skip the vanilla extract—it adds such depth in flavor!
- Color it red: Stir in the red food coloring until evenly mixed. Let your inner artist shine as you watch the batter turn a stunning ruby hue!
- Combine dry ingredients: In another bowl, whisk together the flour, cocoa powder, baking powder, and salt. This helps to ensure an even distribution of the dry ingredients.
- Mix it all together: Gradually add the dry mixture to the wet ingredients, alternating with the buttermilk. Start by adding a little of the dry mixture, then a pour of buttermilk, and repeat until it’s all combined. Remember not to overmix—just stir until the ingredients are barely combined to keep the brownies nice and fudgy!
- Fold in chocolate chips (if using): Give your batter a little extra love and texture by folding in those delightful chocolate chips at this stage.
- Pour and spread: Pour the batter into your prepared baking pan, spreading it out evenly with a spatula.
- Bake: Pop it in the oven for about 25-30 minutes. You’ll know it’s done when a toothpick comes out with a few moist crumbs (not wet!) clinging to it. Don’t overbake—remember, the brownies will continue to cook a little after you take them out.
- Cool and slice: Let the brownies cool in the pan for about 10 minutes, then use the overhanging parchment to lift them out onto a wire rack to cool completely. Now the hard part: waiting to slice them up!
Pro tip: I always make my brownies the night before and let them sit overnight. It allows all the flavors to come together beautifully. Plus, they get even fudgier!
Pro Tips & Variations
Now that you’ve got the basic recipe down, let’s play a little! Here are some fun tweaks you can try:
- Spice it up: Add a pinch of cinnamon or even some espresso powder to amplify the chocolate flavor.
- Make it a layered treat: Spread a layer of cream cheese frosting on top for that classic red velvet cake feel! Or, try a chocolate ganache if you’re feeling extra indulgent.
- Nutty goodness: Chopped walnuts or pecans can add a nice crunch and complement the softness of the brownie.
- Simplify it: If you want a fuss-free version, substitute the homemade brownie mix with your favorite box brownie mix and add the red food coloring. Sometimes less is more!
Serving Suggestions
So, the brownies are ready. Now, how do you serve these little morsels of joy? There are so many delicious ways!
- With a scoop of ice cream: Imagine warm brownies topped with a cool scoop of vanilla bean ice cream slowly melting into the cracks—heavenly!
- Drizzled with chocolate or cream cheese icing: Add an extra touch to the top; it makes for a gorgeous presentation.
- A cup of coffee or tea: These brownies are the perfect afternoon pick-me-up alongside your favorite warm beverage.
Are you feeling the coziness yet? I imagine gathering around the table with friends, sharing laughs and bites of these wonderfully rich brownies. It’s the kind of dessert that brings people together.
Storage Tips
Got leftovers? Lucky you! Here’s how to store them so you can enjoy that deliciousness a bit longer:
- Room temperature: Store in an airtight container for up to 3 days. Just make sure they’re cooled completely before sealing.
- In the fridge: These beauties can last up to a week! Place them in an airtight container to prevent drying out.
- Freezing: Wrap individual brownies in plastic wrap, then place them in a freezer bag. They’ll keep well for about 3 months. Just pop one in the microwave for a few seconds to enjoy them warm!
FAQs
Can I use a different type of flour?
Absolutely! You can experiment with almond flour or gluten-free flour blends if you want to make them gluten-free. Just keep in mind they might affect the texture a bit, so monitor your baking time closely.
What can I substitute if I don’t have buttermilk?
No buttermilk? No problem! You can make a quick replacement by mixing 1 tablespoon of vinegar or lemon juice with 1 cup of milk. Let it sit for about 5-10 minutes, and there you go!
Can I add food color less than 2 tablespoons?
Of course! If you want a subtler red, you can start with 1 tablespoon of food coloring and adjust according to your preference. Just bear in mind the color intensity will also affect the taste slightly.
Is there a vegan version of these brownies?
You bet! Substitute the butter with coconut oil and use flax eggs (1 tablespoon of ground flaxseed mixed with 2.5 tablespoons of water = 1 egg) in place of the eggs. Also, check that the chocolate chips are dairy-free!
How do I know when my brownies are done?
Keep an eye out for that slight cracked top and edges pulling away from the sides of the pan. A toothpick inserted should come out with moist crumbs attached, not wet batter. If it comes out clean, they might be overbaked! Trust your instincts and keep experimenting!
Conclusion
There you have it, dear friends! A wonderfully delectable batch of Red Velvet Brownies that will steal the show at any gathering or indulgent night in. I hope you find as much joy in making and sharing these brownies as I do. If you give this recipe a try, I’d love to hear about your experience! Did you add any special touches? Let me know in the comments below, and as always, happy baking! Let’s savor every bite together!
Leave a Comment